Cloudflare Tunnel as a Kubernetes Deployment — Ingress
Cloudflare Tunnel as a Kubernetes Deployment / Ingress
Cloudflare Tunnel is a great tool to expose web applications to the internet, proxied through Cloudflare. You don’t need to open any incoming ports or allow-list IP-Addresses. It works on a Raspberry Pi at home with an Internet connection behind a NAT, meaning you don’t even need to have a public IP address to expose your services through. It also makes for a great ingress deployment for a k8s/k3s cluster to expose services. With Cloudflare Tunnel, I got rid of my nginx or traefik ingress controller and just expose everything through the cloudflared daemon.
There’s a guide here how to create a tunnel through the web interface, you’ll get a token back which is basically the only thing required to run Cloudflare Tunnel on a Kubernetes cluster. As soon as the tunnel is up and running, you can manage reverse proxy and DNS entries through the Cloudflare Web interface.
Deploying cloudflared
Long story short, you can find the YAML file for the deployment and secret over here or embedded right in this text:
The only thing which might requires editing are the number of replicas you want to run (on line 9) and the version you want to use (line 37). By default, I’ve set the deployment to run 4 instances of the tunnel and it’ll always pull the latest version from the container registry.
Each tunnel process creates two outgoing tunnels into two different locations of Cloudflare, so you’ve got some high availability built-in right out of the box, but for seamless upgrading and handling more connections, it might be helpful to just run a few more replicas.
The only other thing which requires editing, is the Kubernetes secret. You have to edit line 53 and add the Cloudflare Tunnel token you’ve got when you created it through the Dashboard and put it base64 encoded in the YAML file. You can encode the token like so in a Terminal:
echo -n "your-token" | base64
Then put the string in the YAML file:
token: eW91ci10b2tlbg==
Now you can just deploy the YAML file to your Kubernetes cluster:
kubectl apply -f cloudflared.yaml
Create DNS Records for Your Deployments
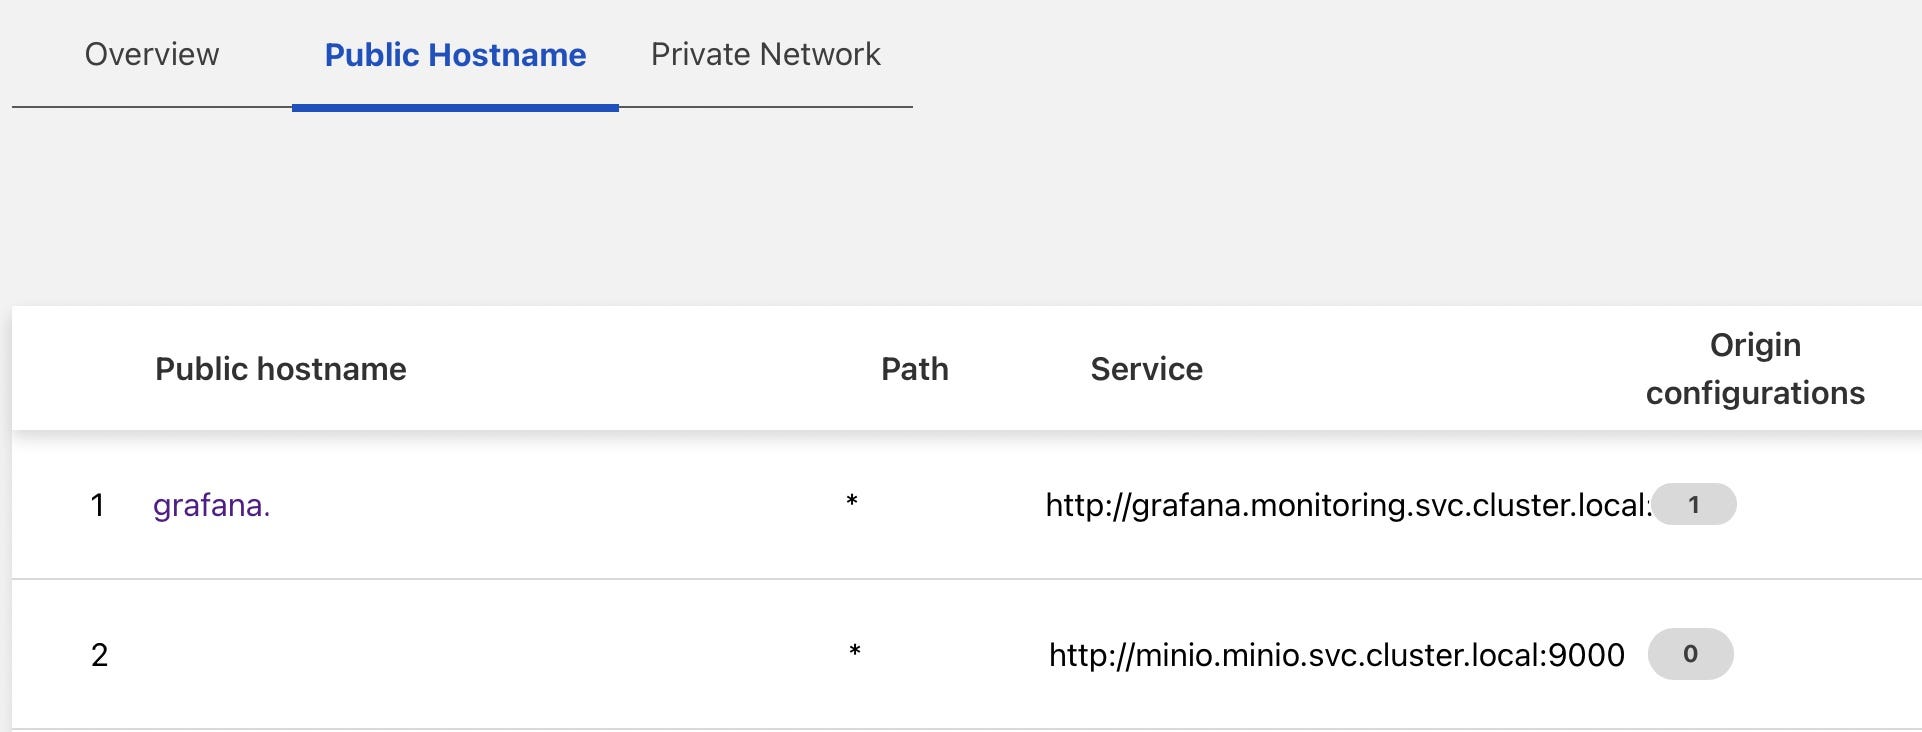
Now you want to make your Kubernetes services available to the internet, to make this happen, log-in to the Cloudflare Dashboard, navigate to Access => Tunnels and Add a public hostname.
Hostnames in k8s are built up like this:
<service-name>.<namespace>.svc.cluster.local
Assuming I have a deployment called grafana in the monitoring namespace listening on port 3000, you’d need to configure this in Cloudflare similar to this:
grafana.monitoring.svc.cluster.local:3000
If you have something in your default namespace, just use default instead of monitoring.

The DNS records will be created automatically, and the Cloudflare Tunnel process will automatically pick up these changes and routes traffic to your services. This way, you don’t need any other ingress controller on your cluster.